Folders
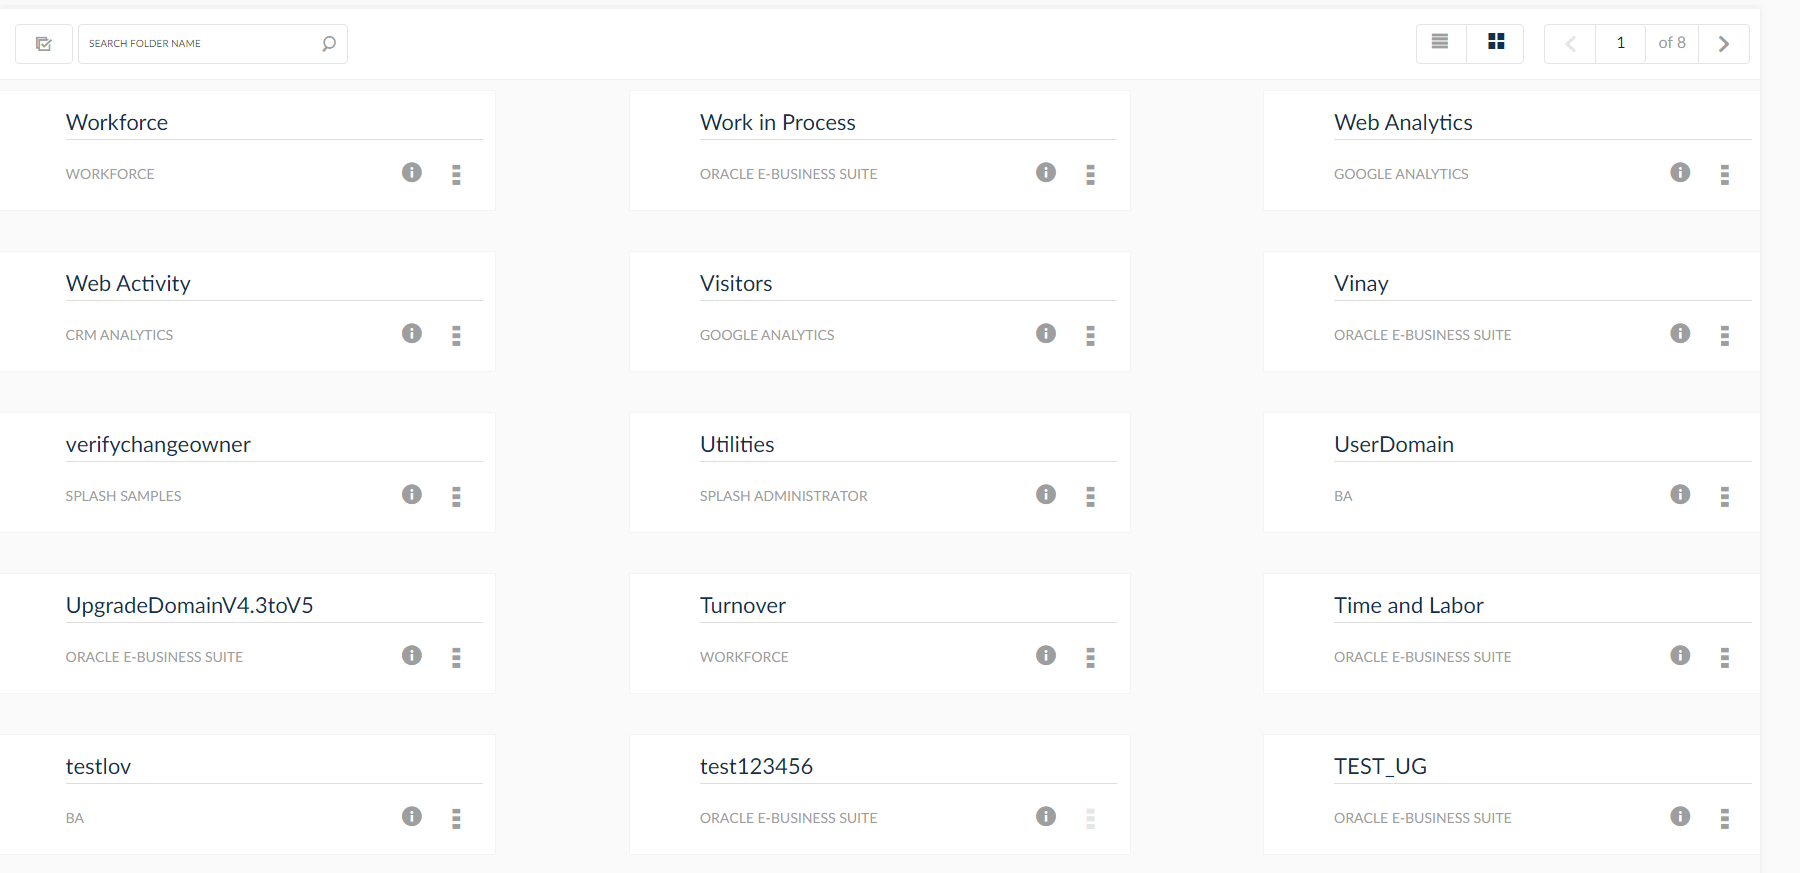
Folders can also be set up to categorize reports, charts and dashboards for sharing and collaboration efforts within the company. Folders are another way to make SplashBI more usable.
- Click the
 icon from the tool bar.
 - In the Administrator Grid View, click the Setup menu.
- In the Setup page, click Folders.
- Click the Folders menu to setup a new group. The list of groups are displayed in the grid view. Click Create icon to set up a new folder, and a new pop up window will be displayed.
- Enter a Folder Name to represent a sub-group under the Business Area. e.g. Operations, Payables, HR, etc.
- Choose the Business Application from the drop down, the data source is connected.
- Enter the description in the Description field.
- Click Choose Icon to upload an icon. When an image is uploaded to the group, this image will be displayed for every group within SplashBI. e.g. Reports, Charts, and Dashboards Group view.
- Click Save.


Selecting Icons
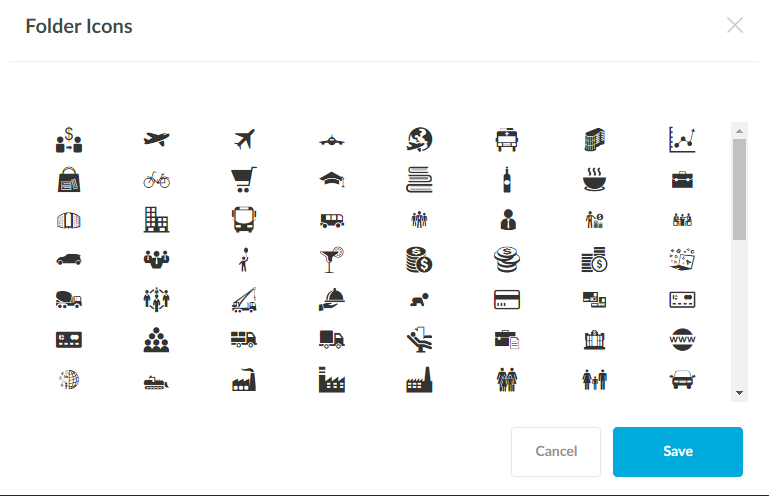
- Select domain related icon from Icon Box. e.g. for an education based domain select an icon relative to education.
- After selecting an icon, click Save.